

In our initial assessment of the HomePod, we found it to be a great listening device for Apple Music or Podcasts, but frustratingly limited in many other ways. That’s still largely true, but at least some of our complaints have been addressed in subsequent software updates.
Perhaps the most important was the iOS 13.2 update that added multi-user support for HomePod. As a device designed to sit out in the common rooms of your home, it was beyond frustrating that it was locked to a single Apple ID, and that anyone using it would be listening to your music (and influencing your recommendations), your lists, your calendar…
You can now make HomePod recognize multiple users, which means each user will use their own Apple Music account, calendar, lists, and reminders. Setting this up isn’t quite as intuitive as it could be, so here’s a quick walkthrough of how to get it working.
HomePod multi-user requirements
In order to use multi-user support on HomePod, you need to meet several requirements.
First, make sure your iPhone (and those of the other users) has been updated to at least iOS 13.2.
Make sure your HomePod is updated to iOS 13.2 also. To check, open the Home app on the iPhone linked to your HomePod. Tap the House icon in the upper left. In the Speakers & TVs section, tap Software Update.
The iOS 13.2 update added several important new features for HomePod, including multi-user support, handoff for music, ambient sounds, sleep timers, and music in Home scenes.
You’ll also have to enable two-factor authentication on your Apple ID.
Every user that wants to be recognized by the HomePod needs to be added as a user in the Home app by the person who set up the HomePod. In other words, you’ll share access to HomePod the same way you share access to your smart lights, smart locks, and so on.
 Apple
AppleEach user that wants to be recognized by your HomePod must be part of your Home group.
Each user needs to have their location enabled, and set to their primary iPhone. Open Settings > tap your name at the top > Find My > and turn on Share My Location. Then set My Location to This Device. This is necessary to keep the HomePod from allowing access to your account when you’re clearly not at home.
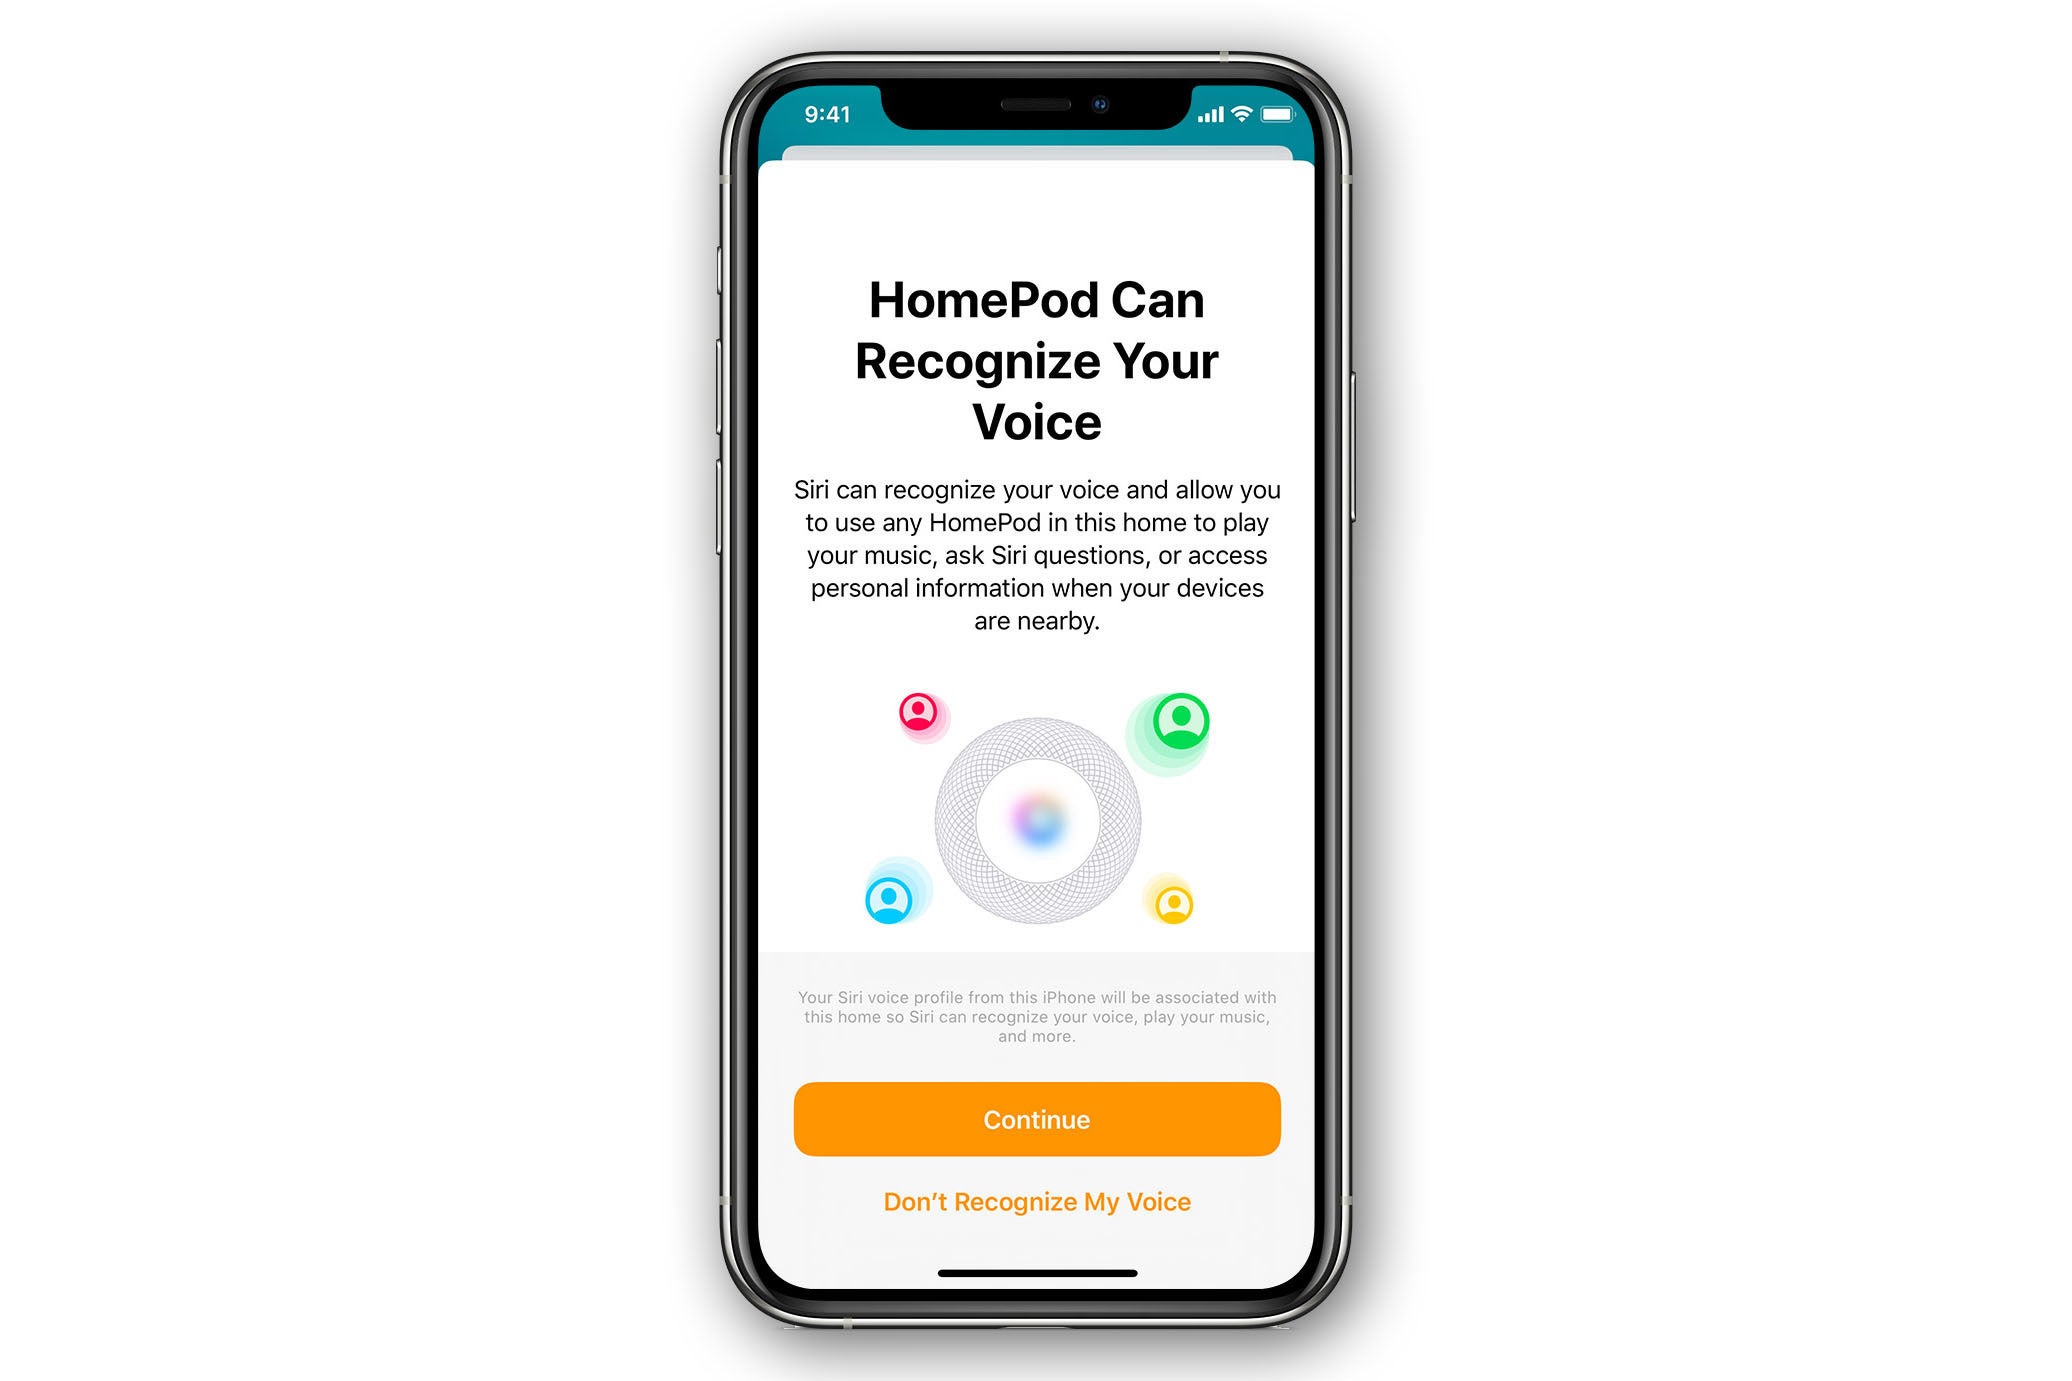
Setting up HomePod to recognize other users
Once each user has met the above requirements, they will get a popup in the Home app saying that the HomePod can recognize their voice. They only need to press Continue.
 Apple
AppleIf you’re part of a Home group with a HomePod and meet all the other requirements, you’ll be asked if you want it to recognize your voice.
If they don’t get the notification, and they are sure that all the above requirements are met, then they can check manually. Have each user you want to add open the Home app and press the house icon in the upper left. They should see themselves listed under People together with the person who set up the HomePod, and everyone else with access to that Home.
 IDG
IDGEach user in the Home group can enable or disable recognizing their voice, or turn off Personal Requests.
They should tap their name, and then make sure Recognize My Voice is enabled. Each user can tap Personal Requests to enable or disable that feature, which provides access to messages, calls, reminders, and calendar.
Still having trouble getting Siri to recognize other users? Have them each turn Recognize My Voice off and then on again, waiting a few minutes between. You can also try restarting your HomePod. Open the Home app, tap and hold HomePod, then tap Settings. Scroll down and select Reset HomePod.
Author: Jason Cross, Senior Editor

I have written about technology for my entire professional life - over 25 years. I enjoy learning about how complicated technology works and explaining it in a way anyone can understand.